- Network printer is connected to a network.
- May be wired(Ethernet cable) or wireless(WiFi).
Steps to install network printer
1. Connect the printer to your network

Connecting printer to router through ethernet cable(wired).

Connecting printer through wifi(wireless).
2. Go to Controlpanel and select Devices and Printers
 3. Click "Add Printer"
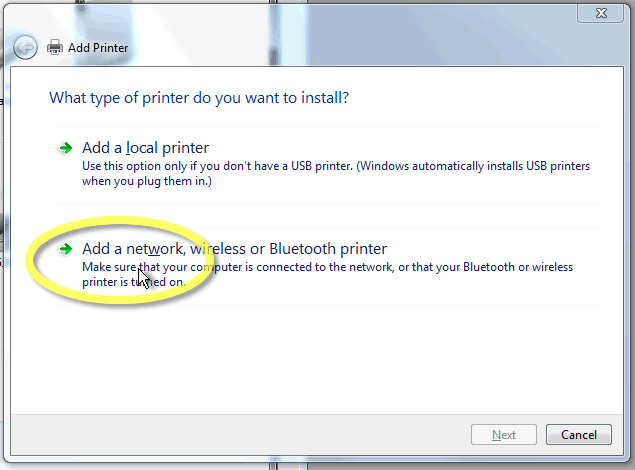
 4. Choose a type of printer

Select "Add a network, wireless or Bluetooth printer".
5. Select printer found by windows

Click next.
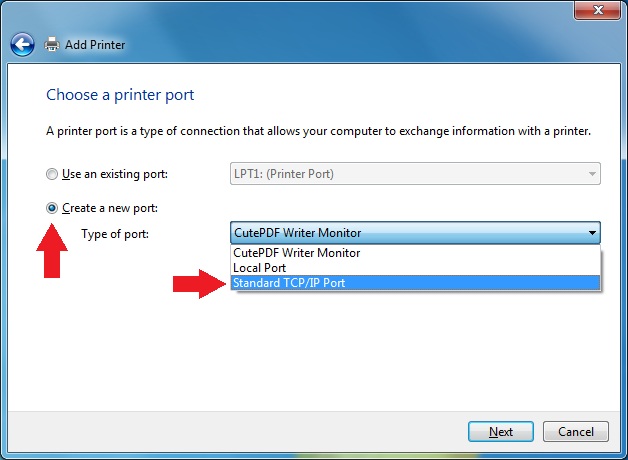
6. Choose a printer port

Select Standard TCP/IP port.
7. Type the IP address

Type printer IP address provided by manufacturer.
8. Select your printer manufacturer and model name

In Manufacturer list select company name and in Printers list select printer model and select have disk if your installing drivers through CD.
9. Insert the disk and choose the correct path
Choose the correct path and click OK.
10. Choose the printer from list

Choose the printer and click next.
11. Enter printer name

Type a new printer name or continue with existing.
12. Printer Sharing

Select share this printers so that others can connect to printer and use it.
13. Set as default Printer and click on finish

Your done with your intallation.
0 comments: